Cruising is all about fun, freedom, and that feeling of escape, but let’s be real—the days leading up to your cruise can feel a little chaotic. Between packing, organizing travel documents, checking in online, and making sure you haven’t forgotten anything important, it’s easy for the excitement to get buried under a pile of to-dos.
The good news? A little planning goes a long way. With the right steps, you can swap that pre-cruise stress for a smooth, easy start to your vacation.
This guide covers 20 essential things to do before your cruise that’ll help you board with confidence, avoid last-minute hiccups, and kick off your trip feeling relaxed and ready to enjoy every moment.
20 Things Every Cruiser Should Do Before Boarding
Before you even step foot on the ship, there are a few things every cruiser should take care of to avoid last-minute stress:
1. Check Your Passport & Travel Docs
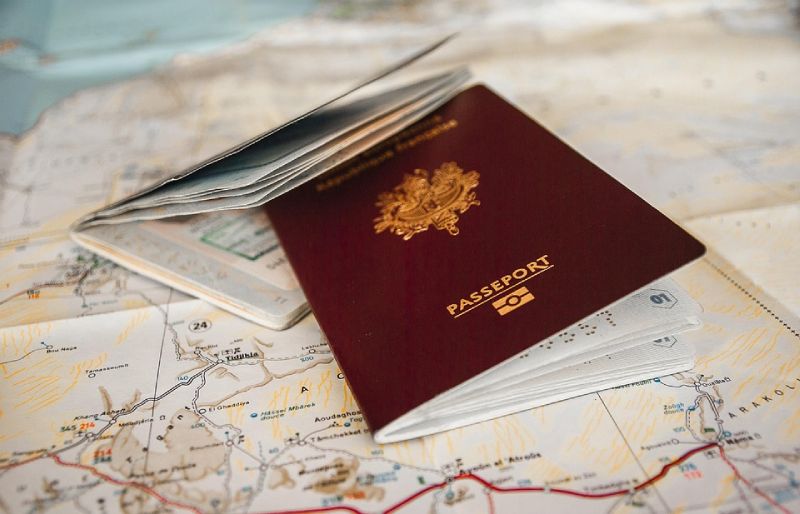
Before you head off on your cruise, take a moment to check your passport and any other important travel documents. Make sure nothing is expired, damaged, or missing. Even if your cruise doesn’t technically require a passport, it’s still smart to bring one just in case.
Double-check that your passport is valid for at least another six months, and make sure you’ve got at least two blank pages. Some countries won’t let you in without them. Once you’re packed, keep your passport somewhere easy to access. This is the one thing you absolutely cannot afford to lose.
It’s also smart to bring a photocopy or digital copy of your passport and other travel documents, just in case anything gets lost or stolen during your trip.
2. Complete Online Check-In

Completing your online check-in before the cruise might sound obvious, but it’s something a surprising number of people can miss. If you show up at the terminal without having done it, you may have to stand in longer lines, manually enter your info, and deal with extra things that can seriously slow things down.
Most cruise lines open online check-in a few weeks before sailing, and it only takes a few minutes. You’ll typically need to fill out your personal details, upload a photo, and link a credit or debit card to your onboard account.
Once you’re checked in, be sure to print your boarding pass or save a digital copy to your phone so it’s ready to show at the terminal.
3. Double-Check Embarkation Time & Port

Make sure to double-check both the departure time and the exact port location, especially if you’re sailing from a city with multiple cruise terminals. This information is usually available in your cruise documents or the cruise line’s app.
Also keep in mind that boarding usually closes 60–90 minutes before the scheduled departure, even if the ship hasn’t left yet. Showing up late or heading to the wrong terminal can easily result in missing the ship, and cruise lines aren’t required to wait or issue refunds if that happens.
4. Arrange Transportation to the Port
Make sure to arrange your transportation to the port ahead of time so you’re not scrambling on embarkation day. Most cruise ports are pretty well connected to public transportation, so getting there usually isn’t too complicated.
You can take a shuttle, Uber, taxi, or other local transit depending on what’s available in the area. Driving yourself is also an option, but keep in mind you’ll need to book parking for the entire duration of your cruise—so it’s not recommended.
If you don’t live near the port, you’ll also need to arrange a flight to your embarkation city. It’s a good idea to arrive at least a day early, just in case of delays. Staying the night at a hotel near the port or airport can take the stress out of travel and help you start your cruise feeling relaxed.
Alternatively, you can head straight from the airport to the cruise terminal on embarkation day. Some cruise lines even offer their own shuttle services from the airport, which can make things easier.
5. Print Luggage Tags and Boarding Passes
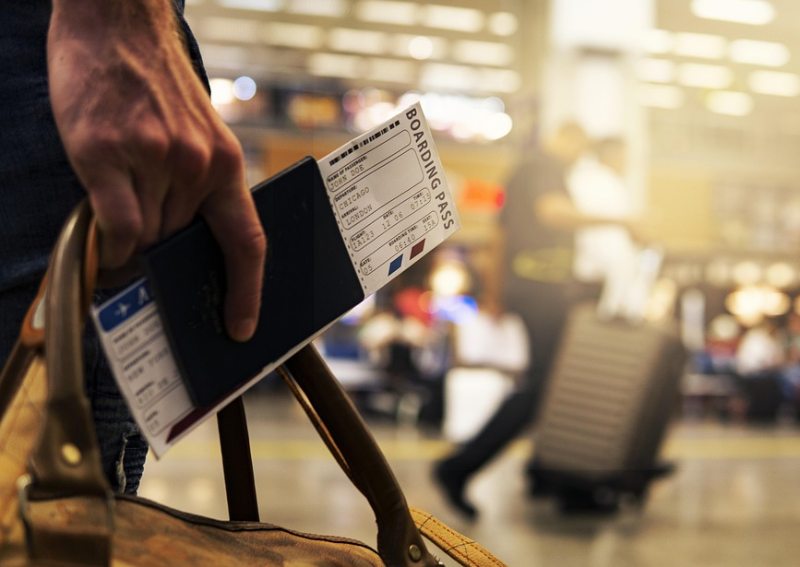
Before you head to the port, make sure you’ve printed your luggage tags. These tags help the crew know where to deliver your bags on the ship, so attaching them ahead of time saves you the hassle of getting them reprinted at the terminal.
You’ll also want to print your boarding pass, even if your cruise line allows a digital version. Having a hard copy ensures you’re covered in case your phone dies, loses signal, or the app doesn’t load properly.
6. Make Key Reservations
Once your cruise is booked, it’s a good idea to start making reservations for anything you don’t want to miss. Popular options like specialty dining, spa treatments, and onboard shows can fill up quickly. Booking these in advance gives you the best chance of getting your preferred times and helps avoid the stress of last-minute decisions once you’re onboard.
When it comes to excursions, you can either book through the cruise line or organize your own private tour. Cruise line excursions are usually more expensive, but they’re well organized and come with added peace of mind—you’re guaranteed to get back to the ship in time.
Independent tours can be more affordable and offer a more personalized experience, but you’ll need to manage your time carefully to make sure you’re back well before departure. Either way, the best tours tend to fill up fast, so it’s smart to book early.
7. Consider Purchasing Travel Insurance
Travel insurance might not be the most exciting part of planning a cruise, but it can be a real lifesaver if something goes wrong. It’s there to help cover unexpected situations like trip cancellations, medical emergencies, or missed connections—things that can be costly and stressful without coverage.
Some cruise lines also offer their own insurance, or you can shop around for third-party options. Either way, it’s worth considering, especially if you’re traveling far, have non-refundable flights, or just want extra peace of mind.
Check out this article for must-know travel insurance tips before your cruise.
8. Make a Packing List
Packing for any trip can be stressful, so it’s helpful to make a list ahead of time to ensure you don’t forget anything important. Be sure to include the basics like swimsuits, casual clothes, formalwear (if your cruise has dress codes), medications, sunscreen, toiletries, and chargers.
It’s also smart to pack cruise-friendly extras like magnetic hooks (cabin walls are metal!), a refillable water bottle, a small fan, or even a nightlight for inside cabins. Some cruise lines also allow you to bring limited snacks or drinks, but be sure to check their policy before you go.
Don’t forget to prepare a carry-on bag with anything you’ll need for the first few hours onboard, since your checked luggage might not arrive at your cabin right away. That includes things like your travel documents, medications, a swimsuit, sunscreen, and phone charger.
Also, be mindful of what items are not allowed—many cruise lines ban things like power strips with surge protectors, candles, or irons. Checking your cruise line’s packing rules and dress code ahead of time can save you from packing stuff you’ll just have to leave behind.
Need a packing list? I’ve created several you can print out, including the Ultimate PDF Cruise Packing List, one tailored for families, and one for minimalists.
9. Don’t Forget Your Medications

Don’t forget to pack enough of your prescription and over-the-counter medications to last your entire trip—plus a little extra, just in case of delays. It’s one of those things that’s easy to overlook, but super important.
While every cruise ship has a medical center onboard, it’s not a full pharmacy, and they might not have the exact medication you need. Even if they do, it’ll likely cost more than what you’d pay back home. Bringing your own means you’re covered for common issues like seasickness, headaches, allergies, or upset stomachs without needing to visit the doctor onboard.
10. Download Your Cruise Line’s App
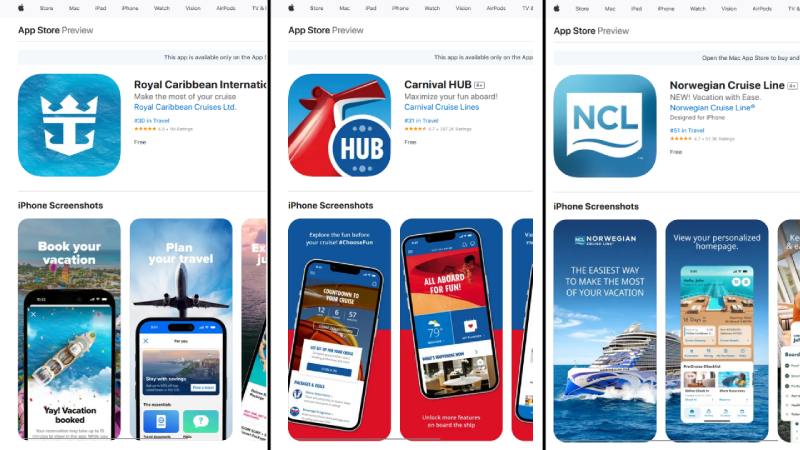
Downloading your cruise line’s app before you sail can make your trip a lot smoother. Most apps let you check the daily schedule, book activities, make restaurant reservations, and even reserve shore excursions. Some also let you message other passengers onboard, and a few even assist with the check-in process.
Each cruise line app offers different features, so it’s worth checking what’s available for your specific sailing. For example, the Royal Caribbean app lets you check in, view your itinerary, access deck maps, and book shore excursions or dining.
Carnival’s HUB app highlights daily events, allows reservations, and includes an onboard chat feature for a small fee. Meanwhile, NCL’s app covers embarkation details, excursion booking, and lets you keep track of your onboard spending.
No matter which line you’re cruising with, downloading their app ahead of time is a simple move that can make your trip smoother. It saves time, helps you stay organized, and keeps everything you need right at your fingertips once you’re onboard.
Download the official cruise line apps here:
- Royal Caribbean App – iOS | Android
- Carnival HUB App – iOS | Android
- Norwegian Cruise Line App – iOS | Android
11. Notify Your Bank

Before you leave for your cruise, it’s a good idea to let your bank know you’ll be traveling, especially if you’re visiting international ports. This helps prevent your onboard or overseas purchases from being flagged as suspicious or declined.
Many banks make this easy with an online travel notification form: you simply log into your account, enter your travel dates and destinations, and you’re all set. Some banking apps even let you do this right from your phone. If your bank doesn’t have an online system, a quick call to customer service can do the trick.
12. Exchange Currency if Needed

If your cruise visits countries with different currencies, it’s smart to exchange some money before you go. Even if your currency is widely accepted, small shops, markets, or taxis may only take local cash. Having some on hand makes things easier, especially in rural areas or less touristy ports.
While you can often find ATMs at or near the port to withdraw local currency, doing it in advance saves you the hassle of searching for one—and potentially paying higher fees. A little preparation goes a long way in making your time ashore stress-free.
13. Put Your Phone in Airplane Mode Before Departure
Before your ship sets sail, make sure to put your phone in airplane mode, and leave it that way for the entire cruise. This simple step can save you from accidentally connecting to a satellite network at sea, which isn’t included in most mobile plans and can come with outrageous roaming fees.
There are plenty of horror stories online about cruisers who came home to find thousands of dollars in unexpected charges just from leaving their phones on at sea. To avoid that kind of nightmare, airplane mode is your best friend.
If you still want to use the internet, most cruise lines offer Wi-Fi packages that let you browse, message, or even stream (depending on the plan). Just turn Wi-Fi back on after activating airplane mode, and you’re good to go.
Royal Caribbean offers the VOOM internet service, with two tiers: “Surf” for basic browsing and messaging, and “Surf + Stream” for higher bandwidth needs like video calls and streaming. Carnival provides three options: Social, Value, and Premium, with the Premium plan being fast enough for Zoom or streaming.
14. Set a Budget for Onboard Spending

It’s easy to lose track of your spending on a cruise. Drinks, specialty dining, shore excursions, spa treatments, souvenirs, and gratuities can all add up quickly. That’s why it’s smart to set a budget before you board. Even having a rough idea of what you’re willing to spend each day or for the entire cruise can help you avoid sticker shock when you see the final bill.
Most cruise lines let you track your onboard spending through their app, so it’s a good idea to check in on it every now and then. You’re on a cruise to enjoy yourself, so feel free to indulge—just keep an eye on the extras, especially those not included in your fare. A little planning can go a long way in helping you have fun without overspending.
Additionally, some cruise lines include onboard credit (OBC) in their booking promos, which can be used for things like drinks, spa treatments, or shore excursions—so be sure to check what’s already included in your booking before budgeting extra.
15. Download Maps, Books, and Entertainment Offline

Before your cruise, take a little time to download anything you’ll want to access without the internet—like maps, books, music, and shows. Even if you’ve purchased a Wi-Fi package, there will be times when you won’t have access to it, like when you’re off the ship exploring a port or in areas with limited connectivity.
Having everything saved offline means you can still find your way around, relax with some entertainment, or read up on your next destination without relying on a signal. You can also save offline areas in Google Maps for each port, so you’ll be able to navigate even without cell service or data.
16. Arrange Pet or House Sitting

If you’ve got pets or a home that needs looking after, be sure to arrange pet or house sitting well before your cruise. Whether it’s a friend, family member, or a trusted professional, knowing someone is keeping an eye on things gives you peace of mind while you’re away.
For pets, it’s important to provide your sitter with clear instructions, enough food and supplies, and contact info for your vet—just in case. If someone’s checking on your home, you might ask them to water plants, take out the trash, or bring in your mail if you haven’t put a hold on it.
17. Don’t Let Your Mail Pile Up
If you’ll be away from home for more than a few days, it’s a good idea to put a hold on your mail through your local post office. This helps prevent your mailbox from overflowing. You can usually request a mail hold online in just a couple of minutes.
Alternatively, you could ask a trusted neighbor or friend to collect it for you—or have it forwarded if you’ll be staying somewhere before or after your cruise. It’s a small detail, but it keeps things tidy and secure while you’re away.
18. Join a Cruise Roll Call (Facebook/Forums)
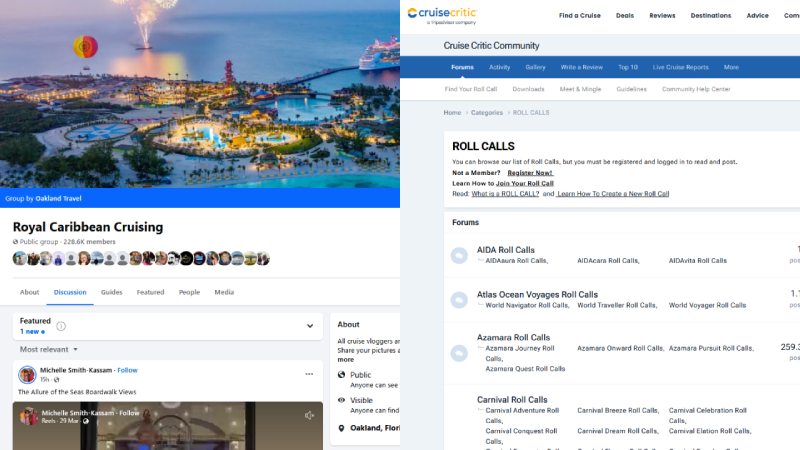
Joining a cruise roll call on Facebook or a cruise forum is a fun way to connect with fellow passengers before you even set sail. These groups are often organized by ship and sail date, and they’re great for swapping tips, asking questions, and sometimes even planning private excursions or meetups onboard.
To get started, check out the Cruise Critic Roll Calls, just select your cruise line and ship to find your sailing. You can also search Facebook for “[Ship Name] + [Sail Date] Roll Call” (e.g., “Wonder of the Seas May 2025 Roll Call”) to find active groups. Some cruise lines also have active communities like the Royal Caribbean Cruisers group on Facebook, where roll calls and general tips are regularly shared.
19. Watch Port- or Ship-Specific YouTube Videos
Watching YouTube videos about your cruise ship or the ports you’ll be visiting is a great way to get a feel for what to expect. You’ll find everything from ship tours and cabin walk-throughs to port guides and excursion reviews, all made by fellow cruisers who’ve been there before.
It’s especially helpful if you’re new to cruising or visiting unfamiliar destinations. These videos can give you a clearer idea of what to pack, what not to miss onboard, and how to make the most of your time in each port.
20. Get Ready to Enjoy Your Cruise

Once everything’s checked off your list, all that’s left is to relax and get excited—your cruise is just around the corner! You’ve done the planning, packed the essentials, and sorted out the details, so now you can shift into vacation mode.
Whether you’re sailing for adventure, relaxation, or a bit of both, cruising is one of the easiest ways to unwind and explore new places. So take a deep breath, grab your bags, and get ready to enjoy every moment at sea.
5 Things to Avoid Before Your Next Cruise
Here are five things you’ll definitely want to avoid before your next cruise to keep your trip smooth, stress-free, and drama-free from the start:
1. Overlooking Visa Requirements for Certain Countries
It’s easy to assume that once you’ve booked your cruise, your passport is all you’ll need, but that’s not always the case.
If you’re thinking of cruising around the stunning coastlines of Australia or New Zealand, keep in mind that U.S. travelers are required to apply for electronic travel authorizations (an ETA for Australia and an NZeTA for New Zealand) before departure.
Likewise, if your cruise stops in countries like India, Vietnam, Brazil, China, or certain parts of the Middle East or Africa, you may need a visa well in advance.
And no, the cruise line doesn’t always handle this for you. If you show up without the correct paperwork, you could be stuck onboard while everyone else explores—or worse, denied boarding altogether.
Even if your cruise only stops in a country for a few hours, that country’s entry rules still apply. This is one of those mistakes that doesn’t seem like a big deal until it’s way too late to fix.
The best move? Go through your itinerary and check visa requirements for each port, even the ones that seem minor. Don’t assume you’re automatically covered just because you’re on a cruise.
2. Packing Valuables in Checked Luggage
It might seem convenient to toss everything into your suitcase and check it in at the cruise terminal. But if you’ve packed valuables like jewelry, electronics, medications, or important documents in there, you’re taking a big risk.
Cruise luggage gets handled by a lot of people before it reaches your cabin, and while it usually shows up without issue, delays, damage, or even loss can and do happen.
The general rule? If you can’t afford to lose it or need it within the first few hours onboard, carry it with you. That includes passports, boarding passes, chargers, wallets, prescription meds, and anything else that’s essential.
For example, if you’re bringing a diamond ring—whether it’s your engagement ring or a special piece you plan to wear for formal night—it should stay in your carry-on, not your suitcase. Your cabin might not be ready right away, but you’ll still have access to your bag, and peace of mind knowing your most important items are with you.
3. Forgetting to Notify the Cruise Line of Dietary Restrictions

If you have any dietary needs—whether it’s a food allergy, gluten intolerance, or you’re vegetarian, vegan, or diabetic—it’s really important to let the cruise line know before you sail.
Cruise kitchens can handle a wide range of special diets—but only if they know ahead of time. On Royal Caribbean, you can note your dietary needs during online check-in or by calling their customer service at least 45 days before sailing. Kosher meals require even more notice, usually around 90 days.
If you forget to mention it ahead of time, you’re not out of luck, but you may face some frustrating moments. You’ll need to speak to the head waiter right away to get things sorted, and while the crew will do their best to help, you might end up waiting longer or having fewer options available, particularly outside the main dining room.
4. Assuming the Cruise Line’s Airport Transfer Is Always the Best
Booking the cruise line’s airport transfer might feel like the safest bet—it’s official, easy to add, and comes with that cruise line stamp of approval. But that doesn’t always make it the best choice. Many cruisers find these transfers more expensive, especially since you’re charged per person instead of per vehicle.
Beyond cost, there are also reports of long lines, large crowds, and long waits at the airport while the cruise line gathers enough passengers to depart. Meanwhile, local taxis and rideshare drivers like Uber and Lyft are well aware of cruise port schedules and often get you to the terminal faster and with far less hassle.
5. Posting Your Cruise Dates on Social Media

It’s tempting to share your cruise countdown or that “boarding now” selfie, especially if you’re excited. But posting your exact cruise dates publicly on social media can open the door to risks you may not have considered.
If your account isn’t private, you’re essentially announcing to the world that your home will be empty for a week or more. It might seem harmless, but unfortunately, break-ins during vacations are a real thing.
The safer move? Wait until you’re back to share those beautiful sunset photos and poolside drinks. Or, if you can’t resist posting in real time, make sure your account is private so only close friends can see your updates.
Related articles:

